This page last updated March 18, 2024
Please note that this information is based on my experience with the wired DMX build of v0.14.2
Using the wired DMX output feature of WLED lets you use a range of DMX fixtures. At a minimum it gives you a cost effective E1.31 to wired DMX bridge but more importantly it lets you use WLED to send various effects to your fixtures without required a DMX control board. Its an easy way to put your DMX lights to work without much effort.
As far as I can tell when you do use the DMX output version of the code you no longer get the pixel output.
I have setup wired DMX out on a range of ESP8266 controllers (NodeMCU, ESP-01 & WEMOS D1)


Hopefully the information below will help you with using wired DMX out on your WLED project.
If you are interested in using E1.31 or Art-Net with your WLED controller then I have some information here:
https://zappedmyself.com/wled-e1-31/
If you want wired DMX input to your WLED controller then a DMX input mod has been done in a release that you can find here:
https://mm.kno.wled.ge/moonmodules/release-notes-v0.14.0-b25/
I`ve not tried it myself….
WLED DMX Code
First you need a version of WLED that supports DMX as this is a feature that must be enabled when the code is compiled. There are two options:
Use Precompiled Code:
If you don’t want to go through the trouble of compiling your own WLED code then thankfully a user srg74 has provided a small repository of pre-compiled versions of WLED software with various modifications. You can find them here:
https://github.com/srg74/WLED-wemos-shield/tree/master/resources/Firmware/@Aircoookie
The contents do constantly change so you need to find a version for your controller (ESP8266 or ESP32) that has the DMX mod. These are typically named something like:
- WLED_x.x.x_esp32_dmx.bin
- WLED_x.x.x_esp8266_dmx.bin
Download the appropriate file and upload it to your controller. This page has more details on various ways to flash a binary file:
https://kno.wled.ge/basics/install-binary/
The pre-compiled code typically used the ESP8266 D4 (GPIO2) pin for the DMX out signal (the binaries on the SRG74 Github site seem to) but you may have to check with who ever provided the compiled binary to make sure.
Compile Your Own Code:
Compiling your own code is a bit more difficult but you can find info on doing so right here:
https://kno.wled.ge/advanced/compiling-wled/
While you can use the Arduino IDE they strongly recommend you use the more complicated Platform IO setup due to the complexity of the build.
Once you have the build environment setup you can follow these instructions to make the required changes to enable DMX output:
https://kno.wled.ge/interfaces/dmx-output/
As you are compiling the code you can select the pin to use for DMX output..
WLED DMX Interface
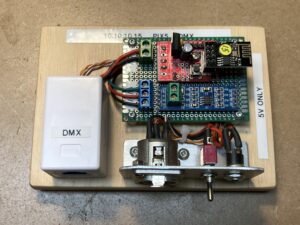
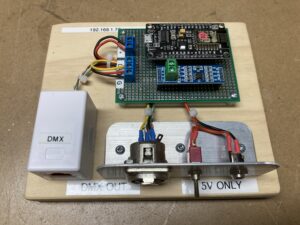
To send out DMX data you need to connect a RS-485 interface to your controller.
The easiest is a pre-built interface like this one:
https://www.seeedstudio.com/Grove-DMX512.html
These are simple to connect to your controller, only needing 3 connections:
- VCC = +5V
- GND = GND
- SIG = WLED DMX Output Pin
This interface has the 3 pin XLR connector for the DMX connection to your lights. You will need an DMX 3 pin XLR to RJ45 adapter if your DMX system uses Ethernet style cabling.
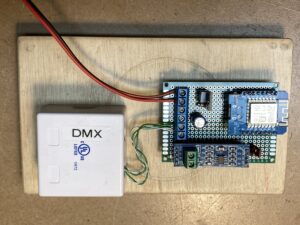
Another option is to use the very low cost MAX485-TTL modules like this:
https://arduinoinfo.mywikis.net/wiki/RS485-Modules
https://www.codrey.com/learn/rs-485-arduino-quick-primer/
These are also simple to connect to your controller and only need 3 connections to your controller:
- VCC = +5V
- GND = GND
- DI = WLED DMX Output Pin
However you also need to attached a 3 pin XLR for the DMX connection (or a RJ45 jack if you use Ethernet cabling for your DMX connection). Connections for both are shown in the spreadsheet below.
DMX Signal | RS-485 Module Pin | XLR Pinout | RJ45 Pinout |
| Data – (Inverting) | B | 2 | 2 |
| Data + (Non inverting) | A | 3 | 1 |
| GND | GND | 1 | 7 |
Also note that you should have a DMX terminator connected to the last fixture to avoid issues with reflection in the DMX cabling causing issues.
WLED DMX Configuration
Configuring DMX is a bit more complicated than just using pixels. Essentially WLED treats a group of 3 DMX channels as a single pixel (having a Red, Green and Blue channel). Some DMX fixtures with a single light just have the 3 channels, while others may have multiple channels for multiple lights. Other DMX lights have extras channels used in addition to the RGB channels for setting various modes and often these lights won’t seem to work if you don’t configure these other channels correctly.
Often DMX fixtures can be configured for different channel modes giving various options in operations. And unfortunately the documentation (especially for cheap DMX fixtures) is often lacking (or non-existent) in details and this greatly adds to the frustration of setting them up.
To start you need to determine the channel mapping of your fixtures. For a simple RGB fixture this can be:
- Channel 1 = Red,
- Channel 2 = Green,
- Channel 3 = Blue.
Note that all the DMX fixtures connected to a single WLED controller must have the same DMX channel map.
If your fixture needs any channels set to enable functionality then you need to account for this. For example some lights have a mode channel that must be set for a value before the light will work or a brightness channel that must be also controlled.
Next you need to configure the addressing of the fixtures. While the first fixture can start at any DMX address, the successive fixtures must be addressed sequentially (for the same simple fixture the first one is at DMX address 1, the second one is at DMX address 4, the next at DMX address 7, etc)
Next in the LED Preferences set the “LED Length” to the number of DMX fixtures you have connected (if each fixture has a single RGB channel) or the number of RGB channels you have connected in total.
Now go to the DMX Output page. Here you need to set the following:
- Channels Per Fixture = Set this for the number of channels your DMX fixture needs.
- Start Channel = Set this for the beginning address of the first fixture.
- Spacing = Set this for the number of channels (same as “channels per fixture” setting)
Under Channel Functions you will now see a group of channels (the number of which match what you set above in Channels Per Fixture). Set each channel to match what your fixture requires. The options include:
- Set To 0 – Always send 0 on this channel
- Set To 255 – Always send 0 on this channel
- Red – Sends the Red value on this channel
- Green – Sends the Green value on this channel
- Blue – Sends the Blue value on this channel
- White – Sends the White value on this channel
- Shutter (Brightness) – Sends the Brightness value on this channel
You may wonder why there is an setting for Spacing between start channels which seem to duplicate Channels per fixture. It lets you pad the number of DMX channels assigned to the fixtures to move the start channel to an easier to figure out channel for fixture programming. Lets say your fixtures use 7 channels, this would mean the start channels would be 1,8,15, 22, etc. You could change the Spacing between start channels to 10 and then the start channels would be on more easy to figure out numbers (1, 11, 21,31, etc). Might make it easier for you, note that it does burn up DMX channels.
Something that is quite helpful is the Channel Map button. It shows you what values are assigned to what channel and in handy to confirm things match what you need.
Note that as far as I can tell you can’t use the pixel output at the same time as you use the DMX output.
DMX Configuration Examples
Here are some example WLED configurations for various types of DMX fixtures
48 LED RGB TUBE
This fixture has 16 groups of RGB LEDs so it needs uses 48 DMX channels:
- DMX Channel 1 = Led #1 Red Intensity
- DMX Channel 2 = Led #1Green Intensity
- DMX Channel 3 = Led #1 Blue Intensity
- ——
- DMX Channel 46 = Led #16 Red Intensity
- DMX Channel 47 = Led #16 Green Intensity
- DMX Channel 48 = Led #16 Blue Intensity
I have just one of the fixtures connected:
- Fixture #1 = DMX Address 1
In WLED you need to configure the following:
LED Preferences:
- Length = 16
DMX Output:
- Channels per fixture = 3
- Start Channel = 1
- Spacing between start channels =3
- Channel 1: Red
- Channel 2: Green
- Channel 3: Blue
36 LED RGB PAR
These are 36 LED RGB fixtures with 7 DMX channels that control the following:
- DMX Channel 1 = Main Dimmer (Master control over all LEDs)
- DMX Channel 2 = Red Intensity
- DMX Channel 3 = Green Intensity
- DMX Channel 4 = Blue Intensity
- DMX Channel 5 = Strobe Rate (Set to 0 for no strobe)
- DMX Channel 6 = Function (Set to 0 for manual control)
- DMX Channel 7 = Speed (Set to 0 for manual control)
I have 5 of the fixtures addressed sequentially like this:
- Fixture #1 = DMX Address 1
- Fixture #2 = DMX Address 8
- Fixture #3 = DMX Address 15
- Fixture #4 = DMX Address 22
- Fixture #5 = DMX Address 29
In WLED you need to configure the following:
LED Preferences:
- Length = 5
DMX Output:
- Channels per fixture = 7
- Start Channel = 1
- Spacing between start channels = 7
- Channel 1: Shutter (Brightness)
- Channel 2: Red
- Channel 3: Green
- Channel 4: Blue
- Channel 5: Set to 0
- Channel 6: Set to 0
- Channel 7: Set to 0
12 LED RGBW PAR
These are 12 LED RGBW fixtures with 8 DMX channels that control the following:
- DMX Channel 1 = Main Dimmer (Master control over all LEDs)
- DMX Channel 2 = Strobe Rate (Set to 0 for no strobe)
- DMX Channel 3 = Function (Set to 0 for manual control)
- DMX Channel 4 = Speed (Set to 0 for manual control)
- DMX Channel 5 = Red Led Intensity
- DMX Channel 6 = Green Led Intensity
- DMX Channel 7 = Blue Led Intensity
- DMX Channel 8 = White Led Intensity
I have 4 of the fixtures addressed sequentially like this:
- Fixture #1 = DMX Address 1
- Fixture #2 = DMX Address 9
- Fixture #3 = DMX Address 17
- Fixture #4 = DMX Address 25
In WLED you need to configure the following:
LED Preferences:
- Length = 4
DMX Output:
- Channels per fixture = 8
- Start Channel = 1
- Spacing between start channels = 8
- Channel 1: Shutter (Brightness)
- Channel 2: Set to 0
- Channel 3: Set to 0
- Channel 4: Set to 0
- Channel 5: Red
- Channel 6: Green
- Channel 7: Blue
- Channel 8: White
Moving Lights
Currently WLED does not have any support for moving lights however you could try setting your fixtures X/Y values to the R/G/B colors and you will get movement based on the color values that your chosen effect uses.
DMX Misc
DMX Fixture Mode – DMX fixtures often have various channel modes. Typically you want to select the simplest mode with the fewest channels (just simple RGB control is easiest) .
DMX Controller – Try to get or make a cheap 6 or 8 channel DMX controller. Some DMX lights have additional control channels that must be set to a value to get the light to work. Being able to confirm the required values before you start setting things up in WLED will make life much easier. You can use a cheap USB-RS485 dongle and free software on your PC. You`ll find more information here.
DMX Sniffer – It is also very handy to see the DMX data you think your are sending. Using an Arduino and a RS485 module you can make a sniffer that will show you the data being sent on all 512 channels. You`ll find more information here.
DMX Termination – Make sure you have a terminator connected to the DMX out of your last fixture. While DMX will often work without one installed you are always best to have one to avoid any mysterious intermittent signal issues.


